Prefer a visual guide? Watch the video below. Please note elements of our UI may have changed since the video's creation.
- To label and segment your traffic
- To define the URL parameters you expect to capture data from
- To define how you might like to pass conversion information back to that traffic source later
Traffic source basics
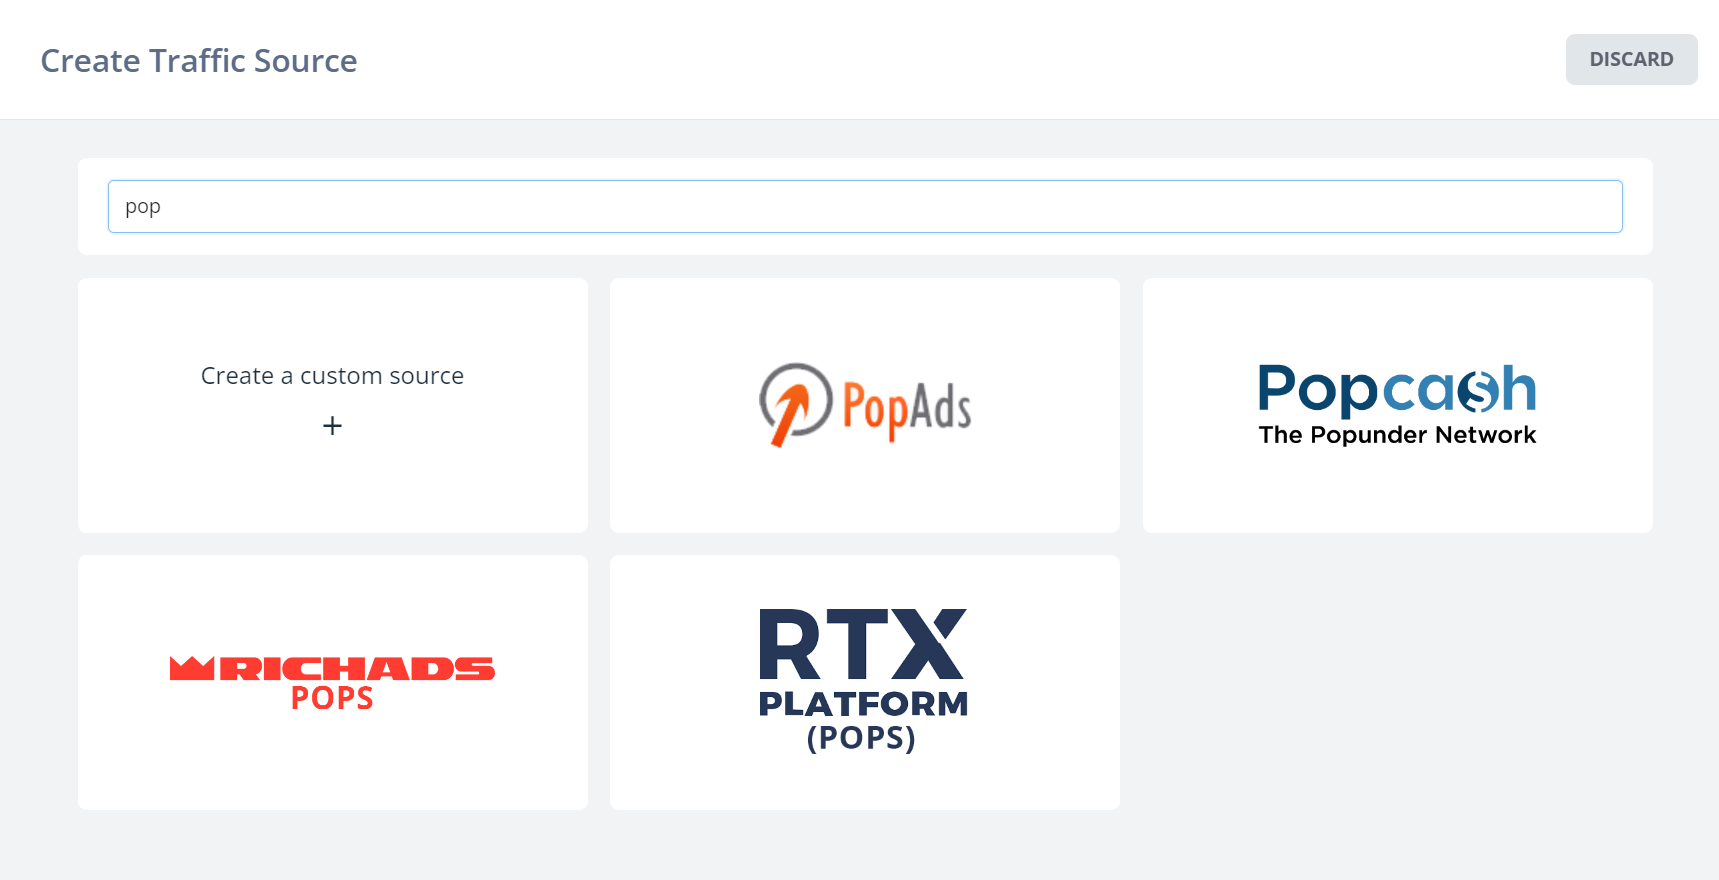
When you create a traffic source, you'll see a list of templates as you type. Click any of these to load that template, or otherwise you can click "Create a custom source".
On the general settings tab of a source you can set some standard properties:
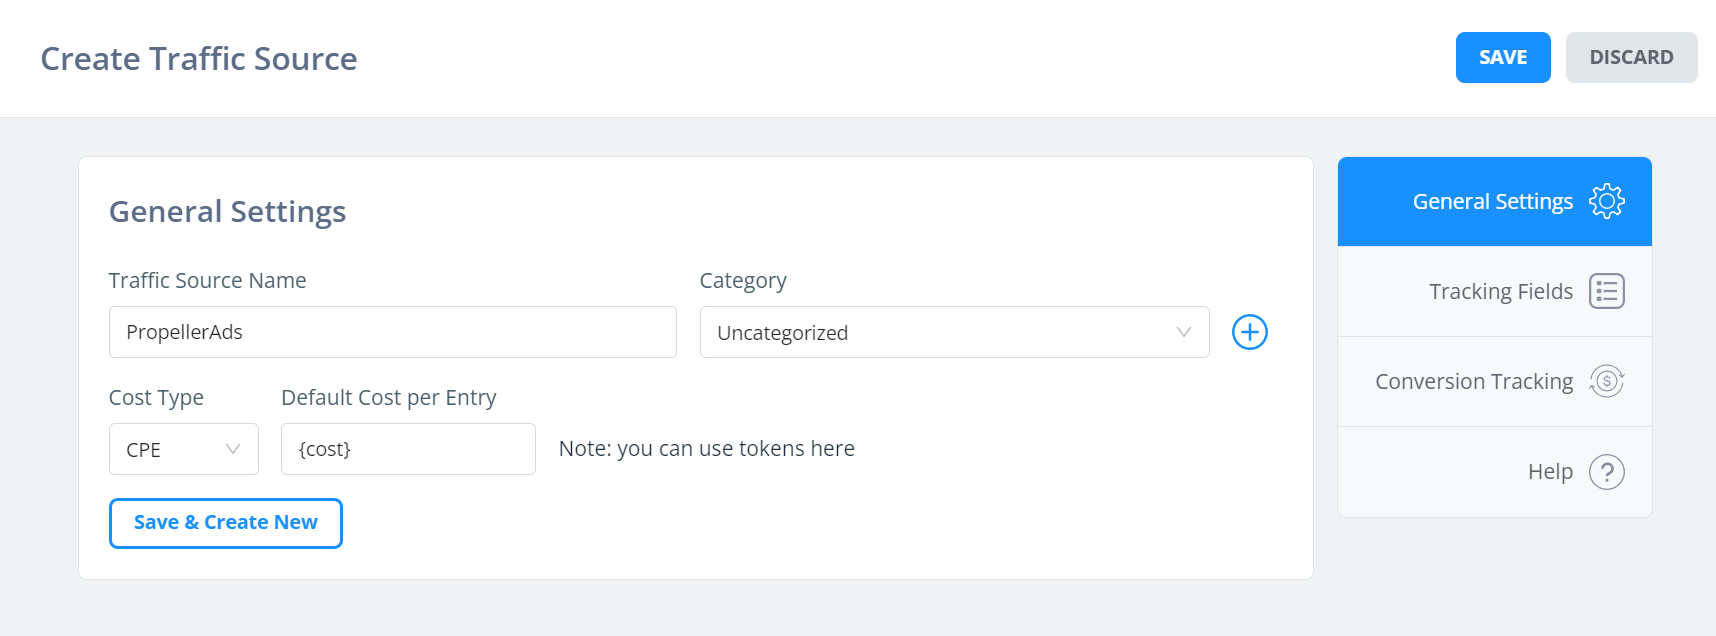
Category allows you to group your traffic sources by type, e.g. Social, Display, Referral, and so on.
Cost type determines how we attribute costs for visitors from this source. CPE is the most common, where we give a "cost per entrance", through adding a parameter to your URLs.
Note if a traffic source only supports passing CPM bids, not per-click costs, you can prefix with cpm_ – see our article here for more information.
Tracking field config
When you generate links in FunnelFlux you must pick a traffic source. This then tells the system what parameters to add to the URL.
For Javascript on a page, the traffic source ID also lets the Javascript know what URL parameters to look for and log to the database.
Typically the URL will be full of tokens, macros or dynamic variables from a traffic source that transform into real data when users are served your ads, or click links.
Here's an example traffic source config:
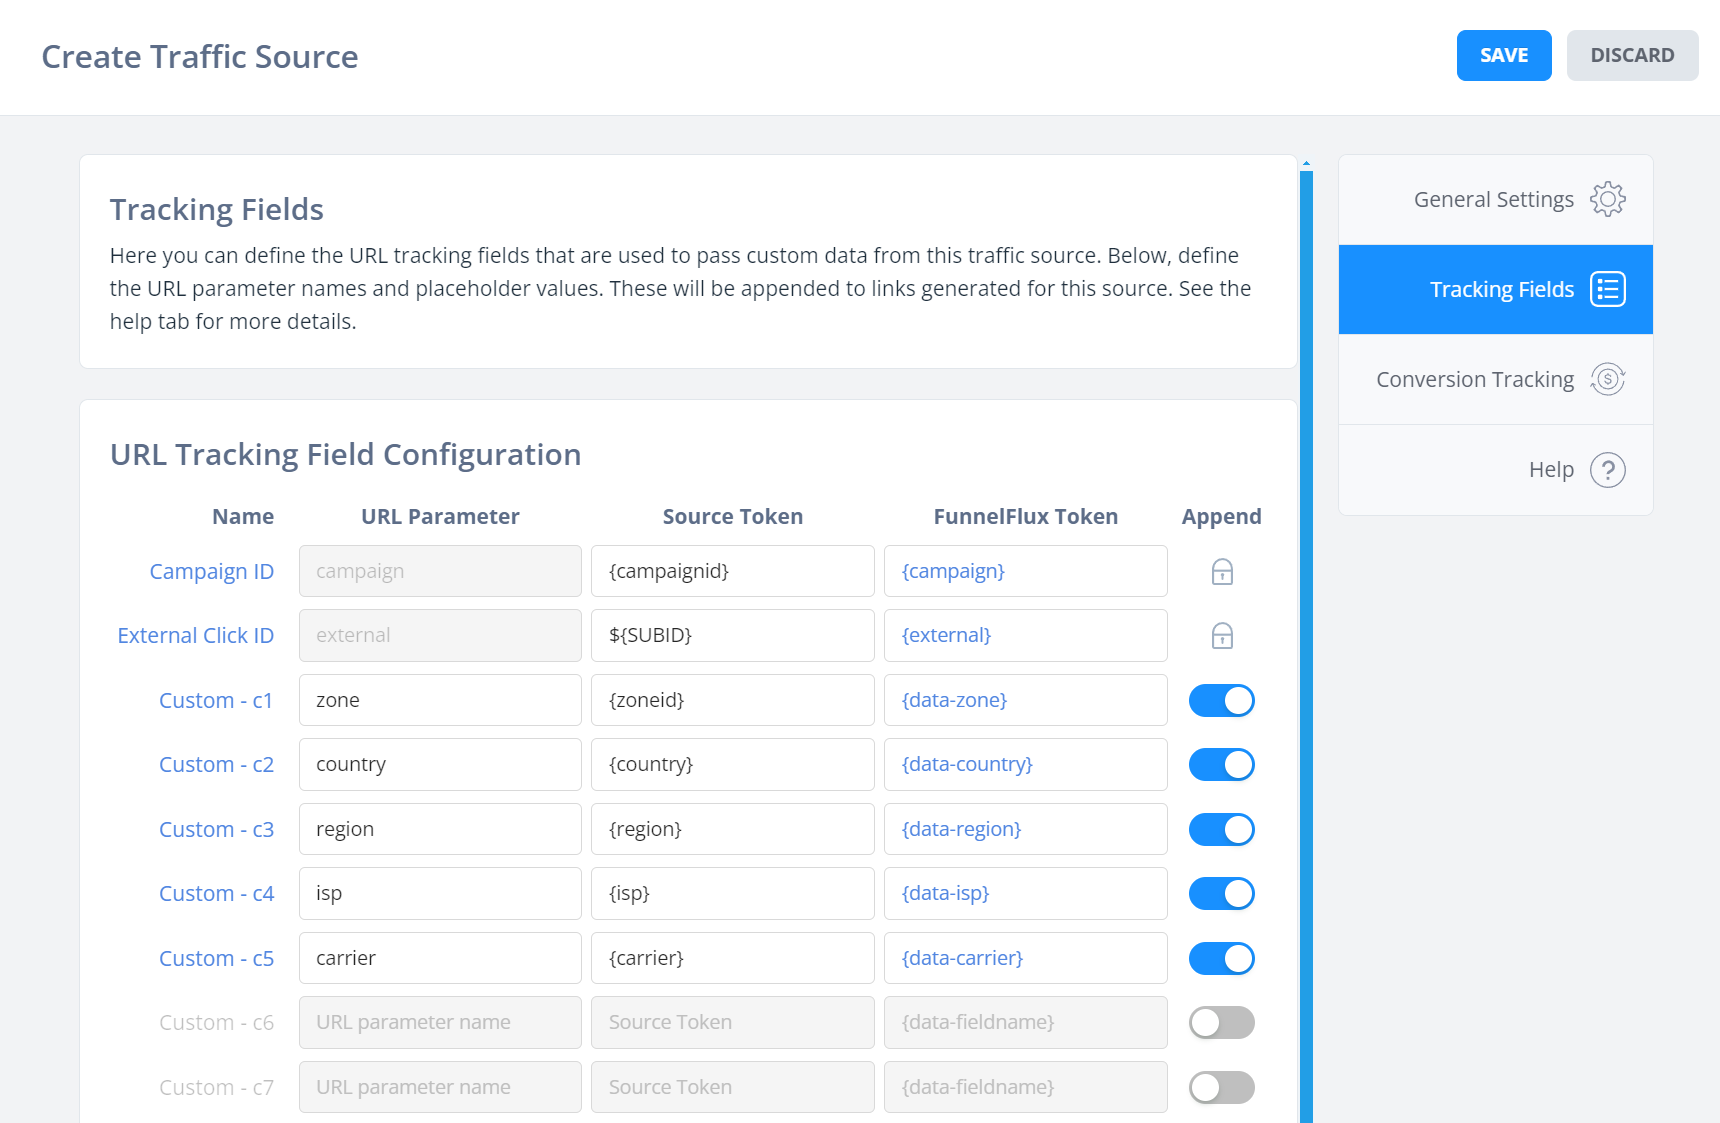
Here you can see our first two fields, campaign and external, are special and reserved.
These should be used for passing campaign IDs and traffic source click IDs for conversion tracking, respectively.
You can also see various other defined fields that we'd like to collect data under (publisher, ad, creative), and some default values to pass for these – generally these placeholders will be "tokens" that the traffic source dynamically replaces in ad URLs to pass real data.
For the above source, if we were to select it when getting a link in the funnel builder, the link would end with:
...?campaign={campaignid}&external=${SUBID}&zone={zoneid}&country={country}®ion={region}&isp={isp}&carrier={carrier}
When used in the actual traffic source, there system would replace these {tokens} by real values, giving something like:
...?campaign=SOME_ID&external=SOME_CLICK_ID&zone=123456789&country=US®ion=Texas&isp=Broadcom&carrier=none
These values then appear in your reporting under tracking fields.
Conversion tracking
The last thing to configure in a traffic source is its conversion tracking.
You'll track conversions using FunnelFlux, and need to tell the platform to communicate conversion information onward to the original source of traffic.
You can do this using a Postback URL, which is a "server-to-server" request, or by using HTML such as an image pixel or Javascript.
Which option to use depends on the traffic source.
Most allow postback URLs, but many platforms, especially those that let you build audiences and retarget like Facebook, Google Ads, Taboola, etc., have Javascript-based tracking.
For many sources like that we have API integrations that should be preferred – in general, it's better to use server-side or API-based conversion tracking, where possible.
Postback URLs
A postback URL is just a link that our server sends a message to.
The end system receives our request, which passes some information, and it uses that to process a conversion.
This always relies on passing unique "click IDs" between systems, as this is the primary way to identify a specific user who converted.
In your traffic source settings, pass any unique click IDs under the external parameter, i.e. so your links have something like this in them:
...?campaign=something&external=some_click_id_value...
Provided this is done correctly, you can use our {external} token in postback URLs to send this value back to the traffic source, e.g.
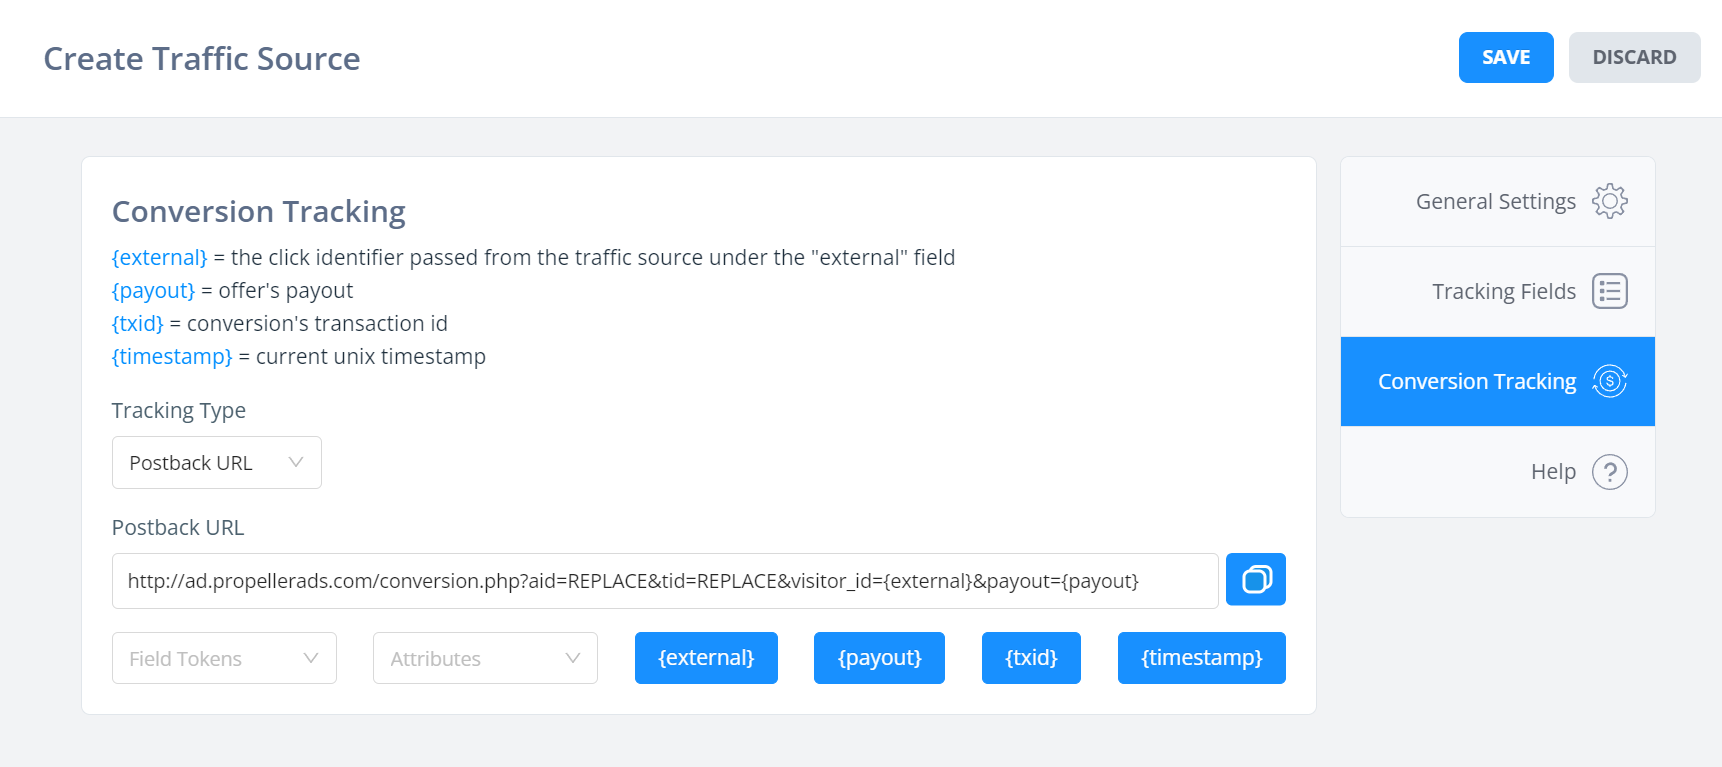
Here you can also use the {payout} token to pass the revenue for the conversion, and {txid} to pass transaction IDs.
Custom Scenarios
For platforms that use API-based conversion tracking, you can choose the custom scenario options:
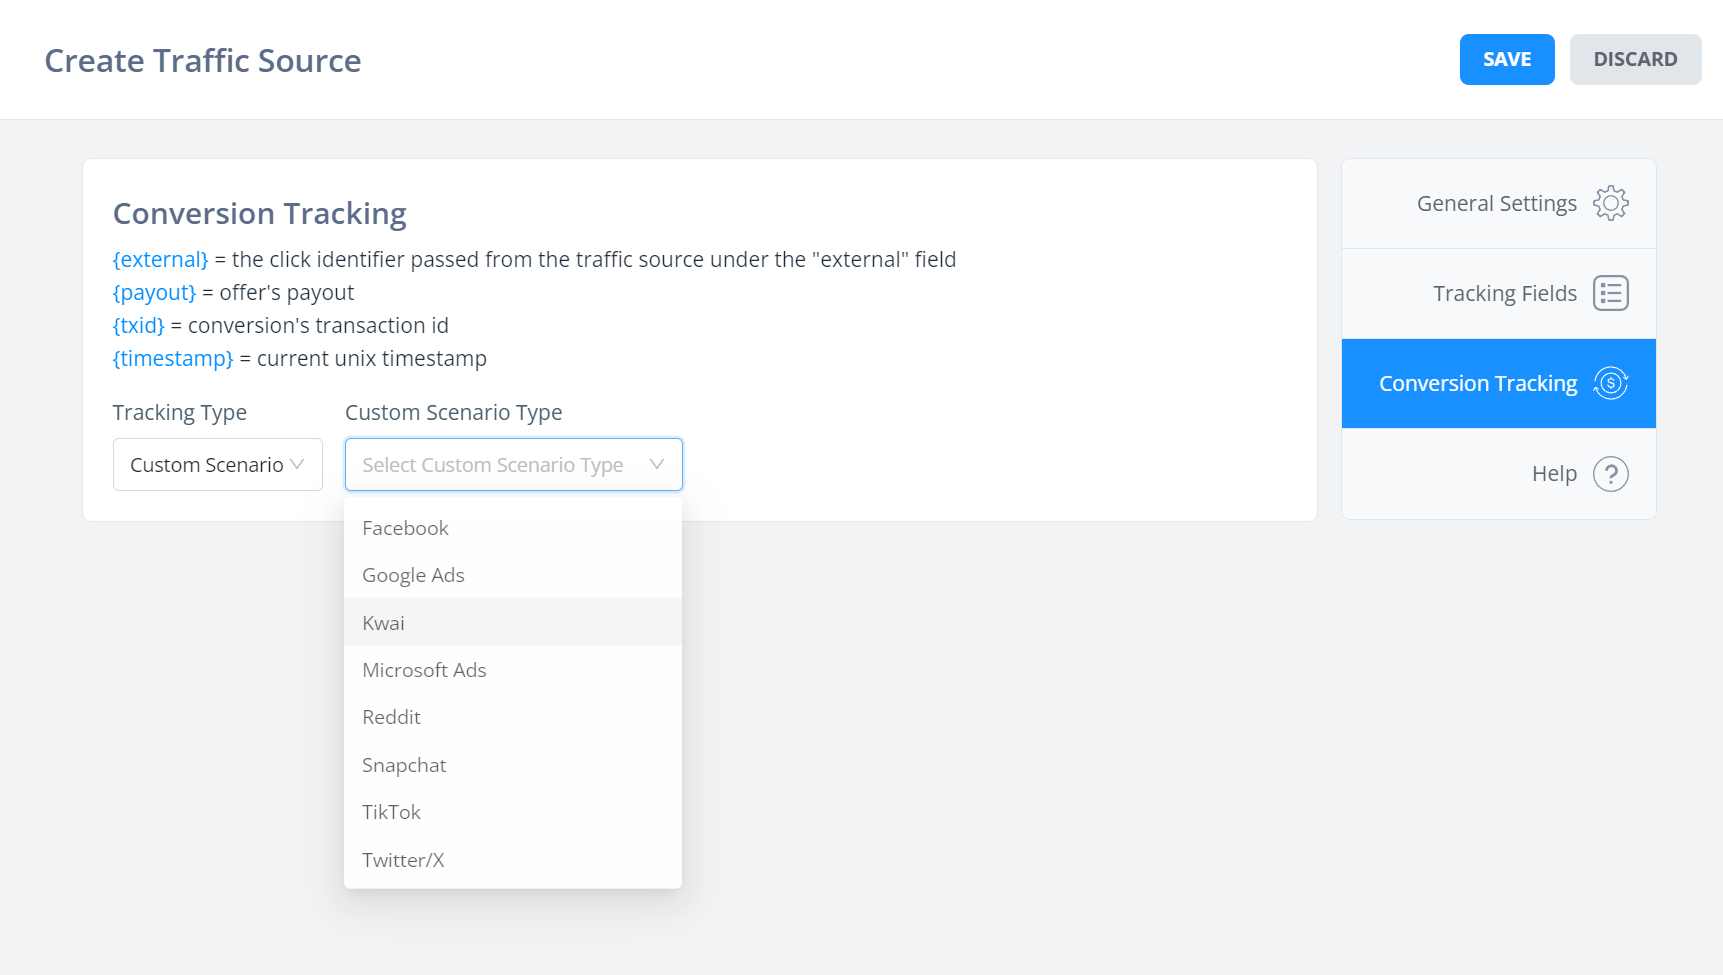
After choosing one of these you will need to input required data, and likely authorise our app to access your account.
For further guidance visit the settings > integrations section, or our custom scenarios help documentation here.
HTML
HTML covers all client-side content, that is content that must be loaded in the user's browser on a conversion page, such as:
- Image pixels
- iFrames
- Javascript code/script tags
Note that you can save HTML and Postback content separately, firing both when a coversion happens, if you'd like.
HTML content is loaded by the user's browser, thus cannot be triggered by a postback URL from some downstream system like an affiliate network.
If you want HTML-type tracking to work, you must put the FunnelFlux conversion javascript code on the page where a conversion happens.
Typically this will be some thank you page, though you can also trigger the conversion manually on any page by directly firing the javascript event.
You can find conversion tracking JS in the settings of any offer, it looks something like this:
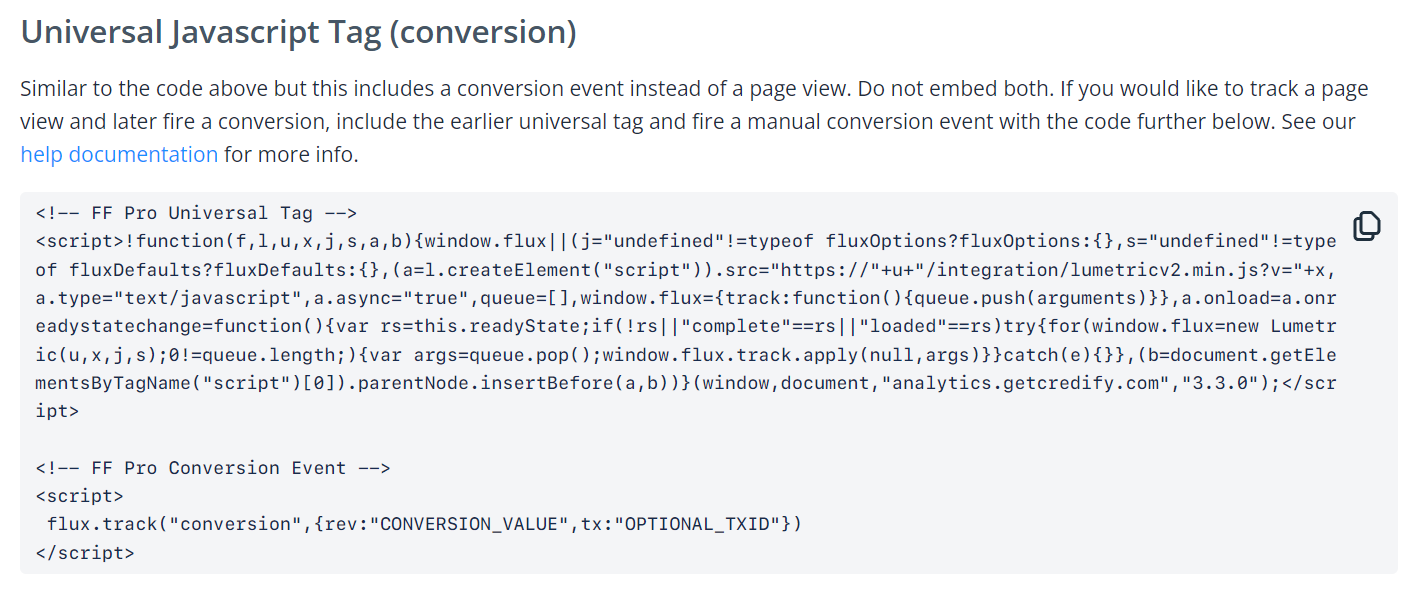
We won't cover how this conversion tracking JS works here, just know that if you want FunnelFlux to fire client-side events you will need to use our JS conversion tracking, as you cannot have a postback URL from a network trigger some traffic source JS via FunnelFlux.
Advanced Settings
Under advanced settings you have a number of options available:
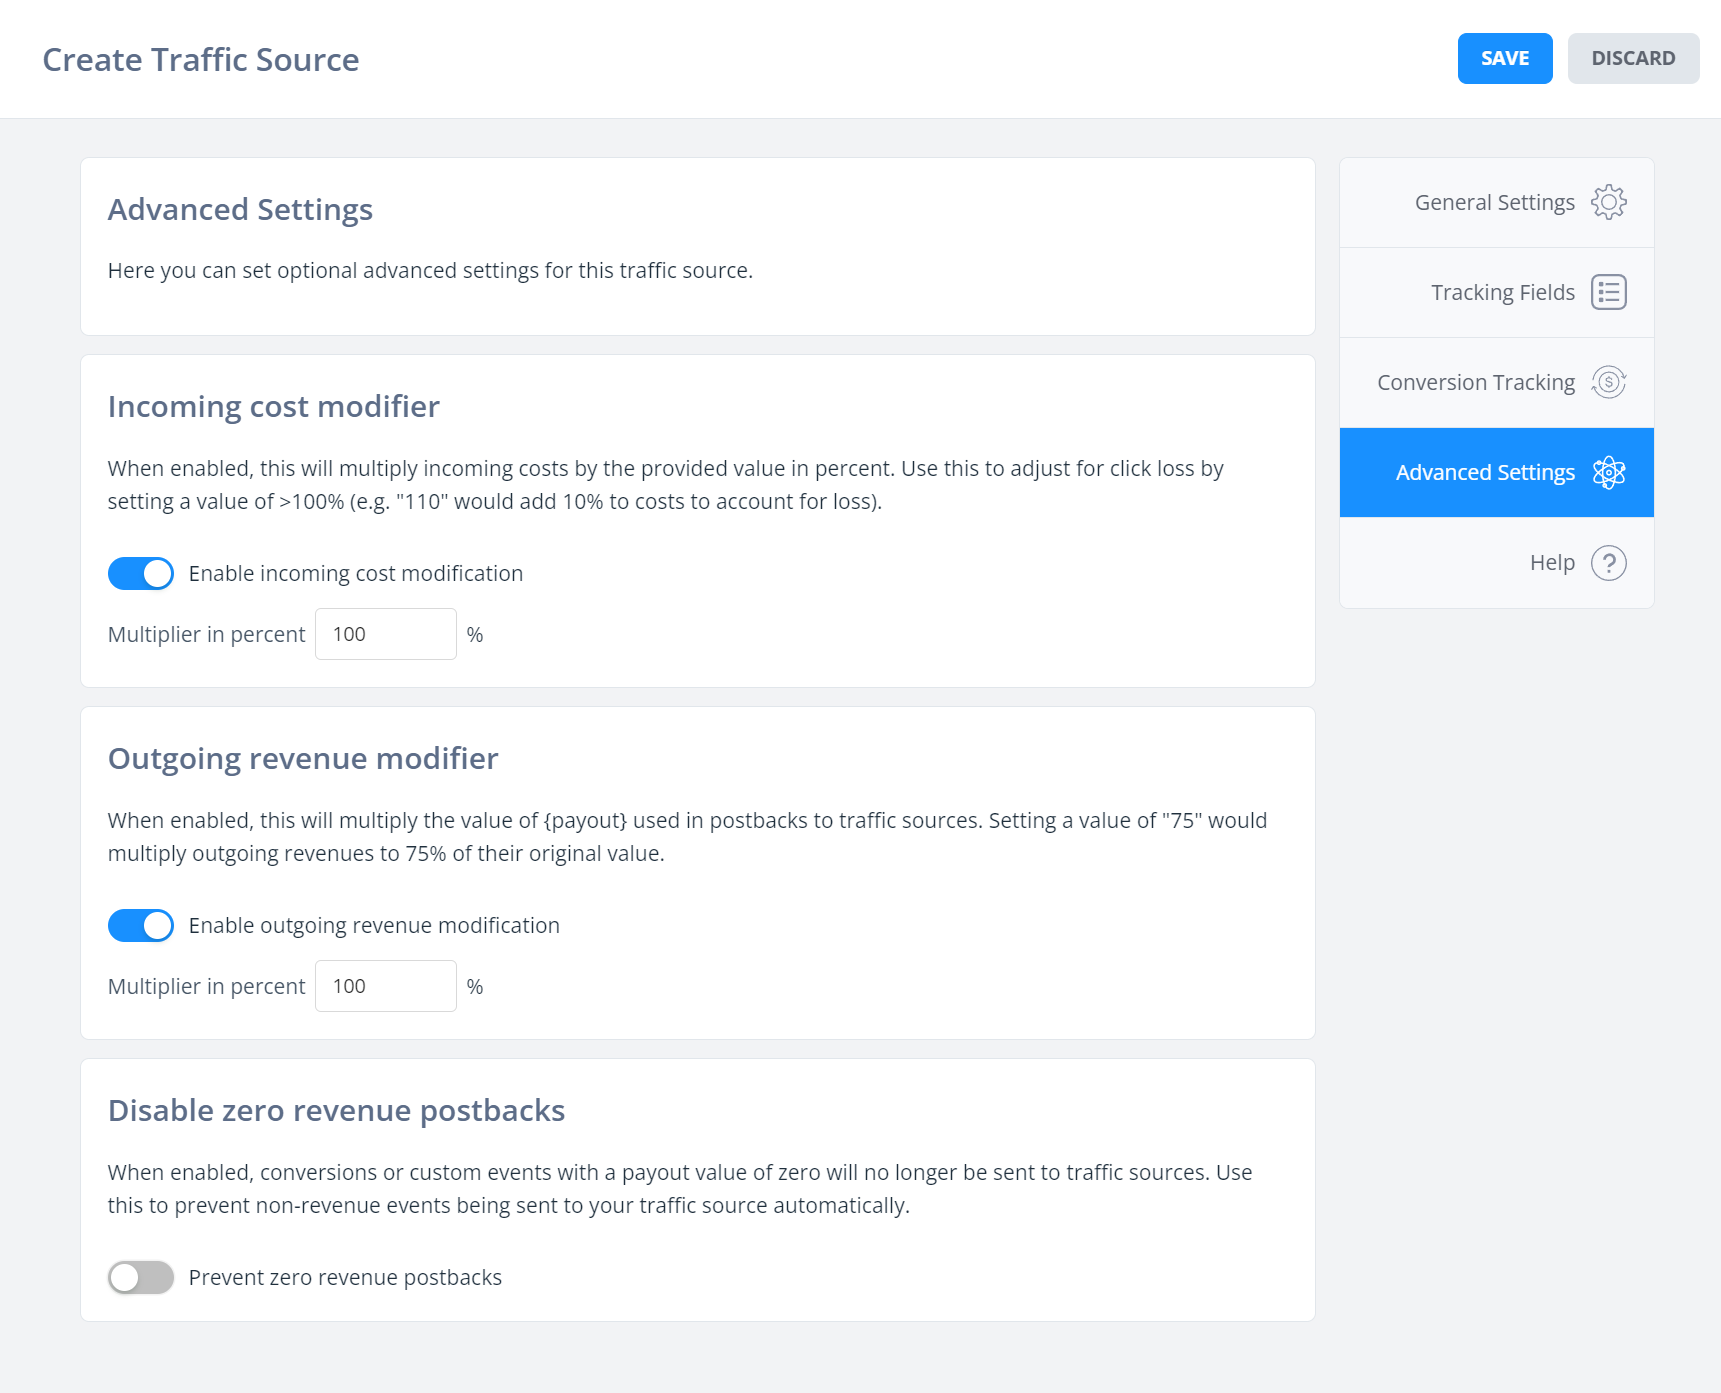
The descriptions above explain these quite well, as repeated below:
Incoming cost modifier
When enabled, this will multiply incoming costs by the provided value in percent. Use this to adjust for click loss by setting a value of >100% (e.g. "110" would add 10% to costs to account for loss).
Outgoing revenue modifier
When enabled, this will multiply the value of {payout} used in postbacks to traffic sources. Setting a value of "75" would multiply outgoing revenues to 75% of their original value.
Disable zero revenue postbacks
When enabled, conversions or custom events with a payout value of zero will no longer be sent to traffic sources. Use this to prevent non-revenue events being sent to your traffic source automatically.


